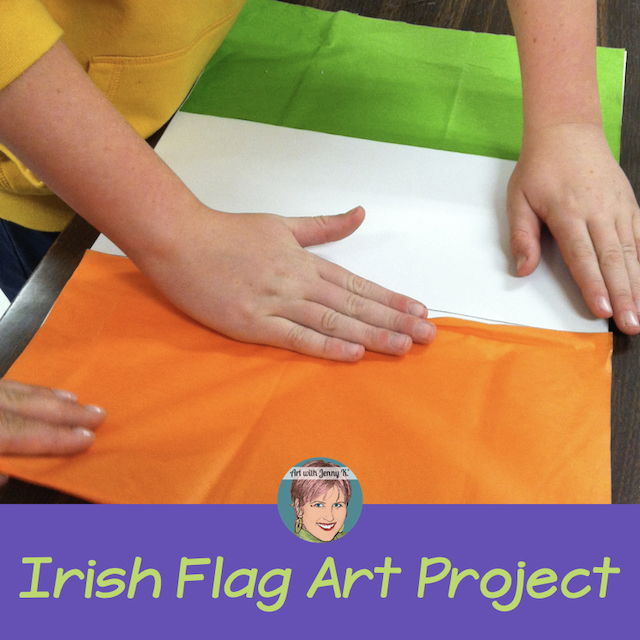
There are a few things about this project that you should know right away. First, this technique can be used for any flag. I chose to do this in March for St. Patrick’s Day so we used the Irish Flag. However (assuming the flag design is fairly simple), you can do this with all different kinds of flags. Second, this technique of using tissue paper for color (instead of paint) can be used for many other projects as well.

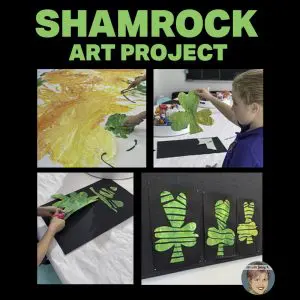
The basic principle is this: instead of using paint, colored pencils, or crayons like you typically would to color something, give students tissue paper to color their flags instead. Students will “paint” the sections with glue and then put the tissue paper on top. This will create a beautiful solid color with a unique solid texture.
You will need
-
-
- 12″ x 18″ white paper
- Orange and green tissue paper
- Green paper for the shamrock
- Glue
- A cup for glue
- A paintbrush
- A pencil
- An eraser
- Scissors
- A ruler
-

This Irish flag art lesson is fun for letting kids do some simple math. Plus, in my experience, kids always need to review using a ruler! So don’t give them all the answers–make them think through this real-life problem.
The Steps
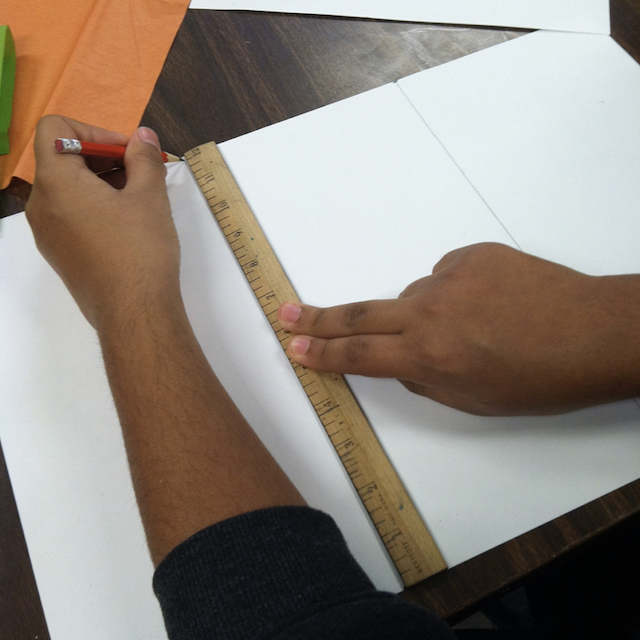
1. Using the ruler and pencil, divide the paper into 3 equal parts to create 3 columns that are 6″ wide. It’s important that students mark their paper at the top and bottom and then draw their lines so they can be sure the columns are the right width.

2. I have the pieces of tissue paper pre-cut to approximately the right size needed (6″ x 12″). I did this mostly just to save time but also to make the line straighter using a paper cutter. However, you could let the kids cut the pieces entirely by themselves. For Step 2, have the students paint the left-side column with a thin layer of glue.

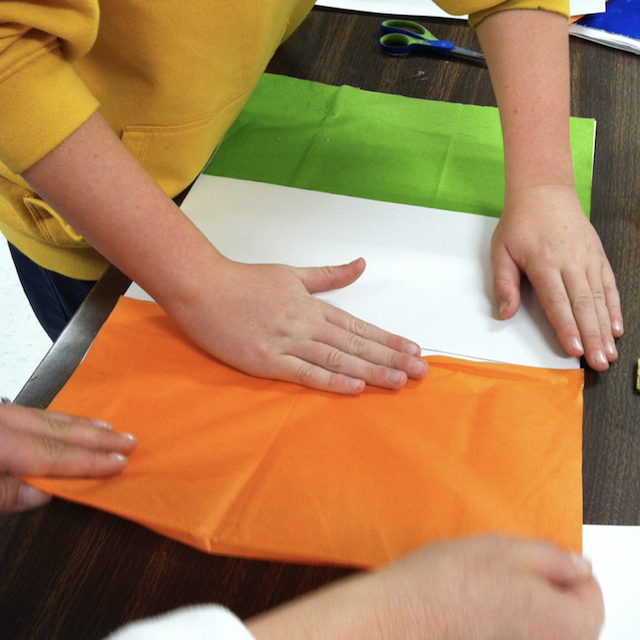
3. Then, place the green tissue paper on top of the glue. Have someone help hold it because it’s hard to reposition it if it doesn’t line up correctly. Line it up with the pencil line and let the rest hang off the edge of the paper to trim later (if there is any).

4. Repeat this process on the far right column. Paint it with glue and then lay on the orange tissue paper. If the tissue paper is larger than the white paper then trim the edges. If the tissue paper is slightly smaller than the white paper, you can trim the entire paper (but I recommend waiting until the glue dries first). Sometimes I trim them with the paper cutter so the edges can be very straight (kids like that!).

Have students help each other to get the pieces on flat.

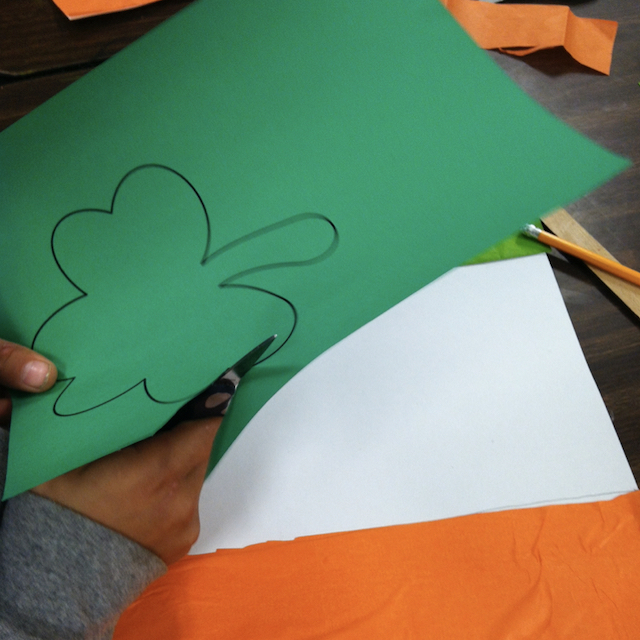
5. After the tissue paper is correctly placed on the flag have students cut out a shamrock and glue it in the middle. There are a few ways to do this. The easiest way is to copy the shamrock template that I’ve provided for you HERE onto green paper. Four will fit on a page and then kids can cut them out and glue them right on. The other way would be to provide them with a template and let them trace it and cut it out of construction paper. If you have time or a parent volunteer, ask them to trace the shamrock design onto old cereal boxes and then make shamrock templates out of the thin cereal box cardboard. This way you’ll have them for years to come.

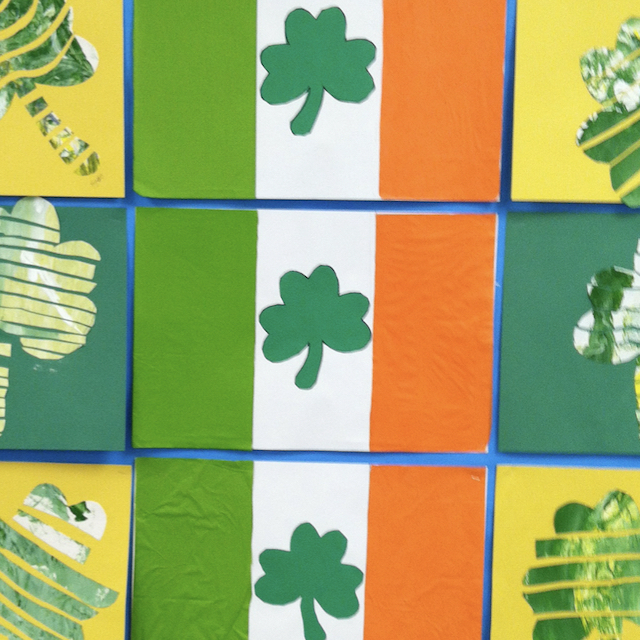
When the flags are complete display them for all to see. If your class is doing any research on Ireland the other work they are doing would look great on display with these flags! I think this technique would be really great for a class studying several countries so different kids could create different flags, then display them together would be beautiful!

This project was used with 3rd & 4th graders but would be appropriate for students in grades 3 and above.
If you are working with younger students, you could still do this Irish flag art project by simply modifying some of it. Have students tear the orange and green tissue paper into small shapes and glue the small pieces on the correct side of the paper (collage style). You can also get pre-cut small squares sometimes in tissue paper, which might be helpful-but most kids can benefit from the fine motor practice of tearing the small pieces.
If you are working with very young children, you may need to pre-draw the three columns OR you could fold the paper into three equal parts so they can see where to put the tissue paper. You might even put a little orange and green mark on the shapes that you want them to fill with the matching tissue paper. Cutting out the shamrock would be okay for them, even if they didn’t do a perfect job!
…and the next time you want kids to paint something, consider letting them “paint” with tissue paper instead. They can always pre-cut shapes to glue down and create a nice texture and color combination for their work. Imagine all the possibilities!
I would love to see your students’ work if you decide to create any of my projects with them. Feel free to tag me (@artwithjennyk or #artwithjennyk) on social media so I can see what they make! You’ll find me on Twitter, Facebook, and Instagram!
Thank you for reading and for making art with your students!