My students loved these lessons, and I loved creating them for my students. Now, I’m excited to share them with you and your students.
Let’s get started…
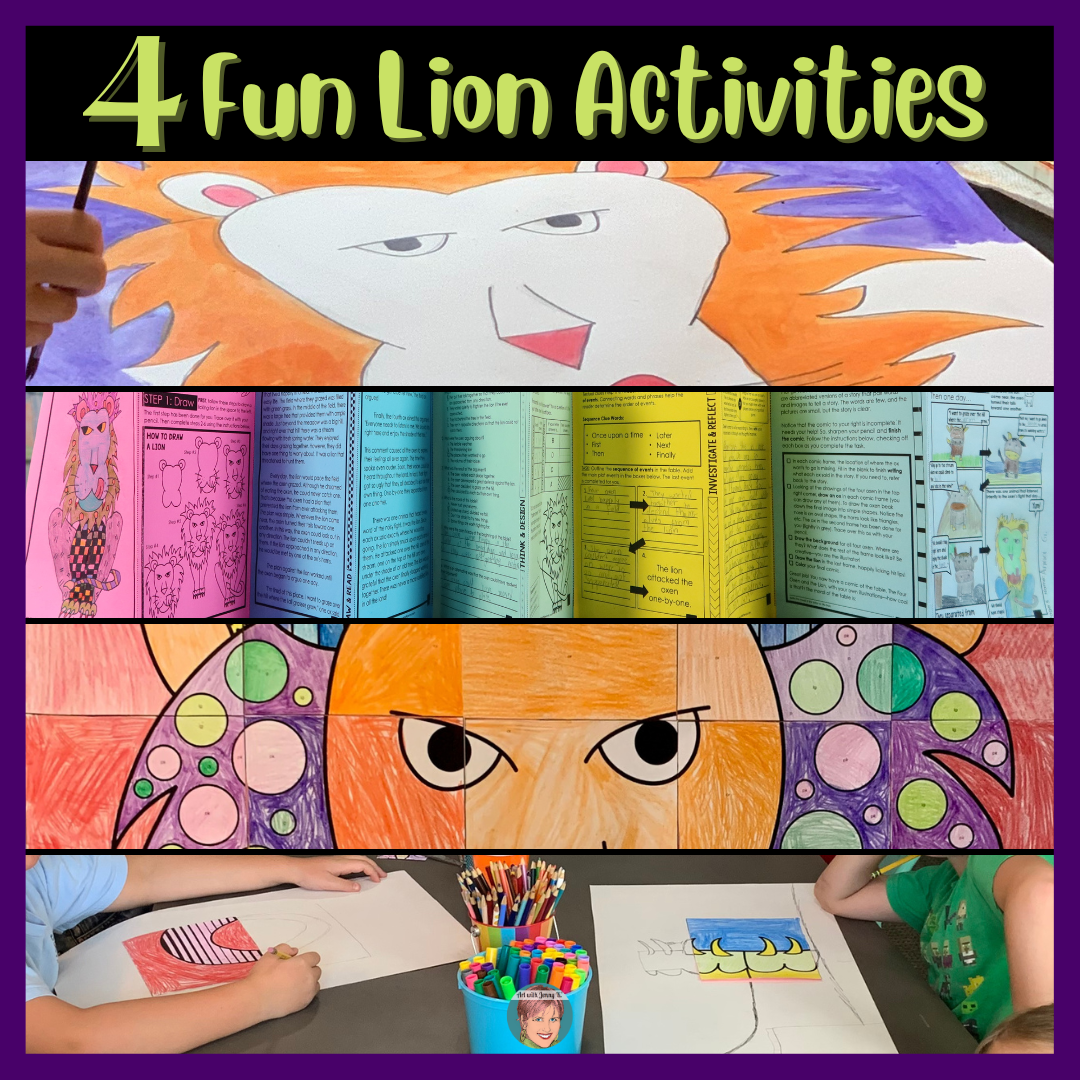
Art + Science | Watercolor Lion Painting With Salt
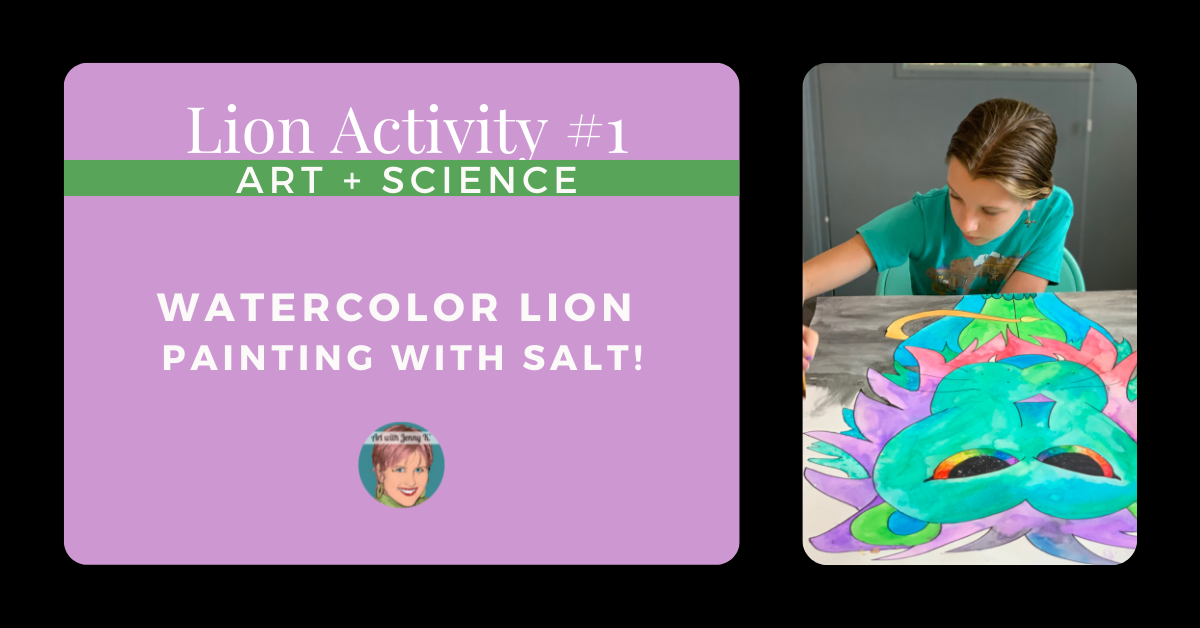
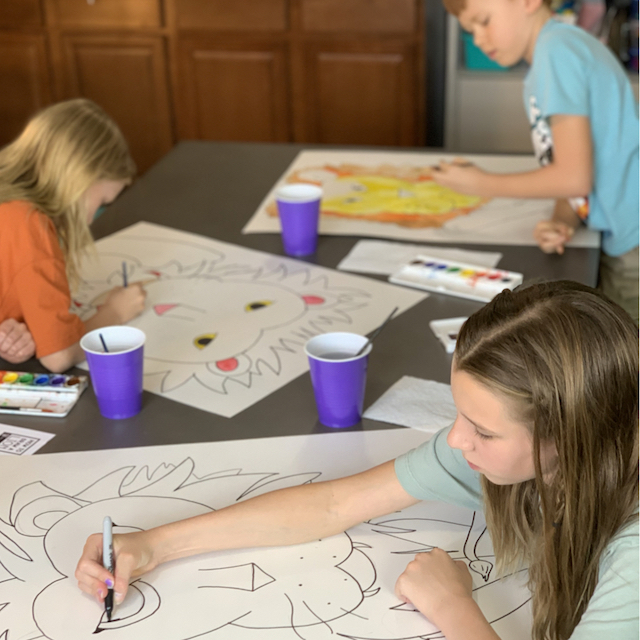
Salt is the secret ingredient for this project. Part of the reason I give each student a poster board to create HUGE paintings is so that they have plenty of space during the last step to experiment with how the salt changes the look of their paintings. This lesson detail (working large) didn’t go unnoticed by my students. When I asked my students to share some of their favorite projects, here is what my student said…
…but more on that later; I’m getting ahead of myself because I can’t wait to share this lion activity with you.
I’ve also compiled these instructions into a downloadable PDF that you can get HERE.
First, let’s talk about what you need for this lesson.
Materials:
- Large paper or poster board
- Pencil and eraser
- Permanent marker (optional)
- Watercolor paint and paintbrush
- Cup of water and paper towels
- Salt
- FREE How-to-draw a lion handout that you can download HERE.
Step 1: Draw
The first thing your students will do is draw their lion with a pencil. I recommend having them practice drawing a lion in their sketchbook or on a separate sheet of paper before drawing onto the poster board so they will feel confident with the steps.
If you didn’t already download my free handout, you can do so HERE.
The handout is also included in the downloadable PDF version of these instructions HERE.
When it’s time to draw on the poster board, encourage your students to take up the whole page. Drawing this large is not something most kids are used to doing, and it helps to have the reminder as they work to draw big! I also remind them to draw lightly on their page so that they can erase any lines that they want to change.
Step 2: Outline
After your students have their sketch just the way they want it, they can outline over their pencil with permanent marker. Drawing an outline is optional, but I highly recommend it. Do what works best for you and your students and the supplies you have.
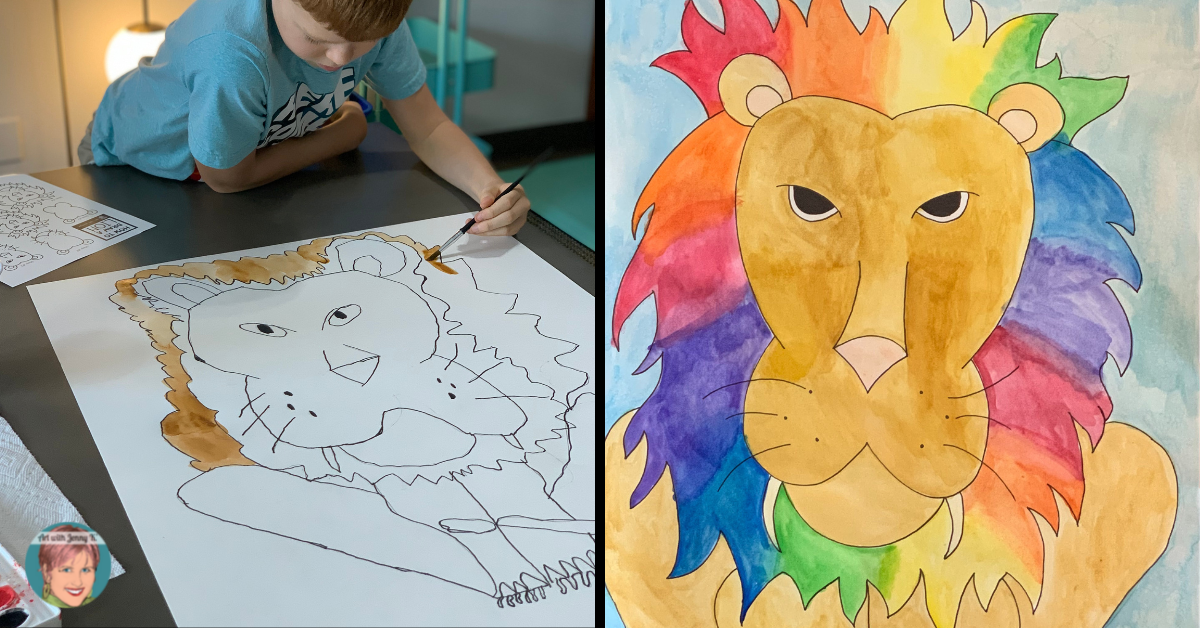
Step 3: Paint
At this point, your students are ready to add watercolors to their lion drawings. I encouraged my students to start by painting only the lion at first so that they can save the background for the next step.
I had some students who felt more comfortable manipulating the materials. (These students had worked on a version of this project before where we painted hummingbirds, I’ve written a blog post about that project too!) They opted to add salt throughout their painting, basically combining this step with the next.
Step 4: Add Salt
Now it’s finally time to add in the secret ingredient, the salt! Adding salt to wet watercolor paint creates beautiful crystal patterns in the paint. This happens because the salt is absorbing the water around it, pulling in the color along with it. The salt absorbs the water and leaves a beautiful crystal design.
This is a great time to talk to students about salt and how it affects our bodies as well, why we are thirsty when we have a lot of salty food, etc.
I have my students wait to paint the background until I’ve explained how the salt works because they will have to work quickly for this step. For the backgrounds, I give students liquid watercolor and large brushes. This way, they are able to cover the background and add salt before the paint dries. This will be less of an issue if you work smaller.
Tips for Working with Salt
- Salt works best in places where there are little pools of paint.
- Once the salt is added, you can’t add any more paint to that section of the artwork, or you will paint over the crystal design.
- Using too much salt in one spot will make the crystal designs hard to see or muddied.
Once all the paintings are dry, the final thing you’ll need to do is wipe off the salt. Have your students hold their painting flat until they are outside or over a trash can. This helps to avoid a mess of salt everywhere.
If you want to read more about using salt with watercolors, you might like my blog post in which my students painted hummingbirds.
Download my FREE PDF version of this lesson plan HERE, or Download my FREE directed drawing lion handout HERE.
Art + ELA| The Four Oxen and The Lion Fable Activity
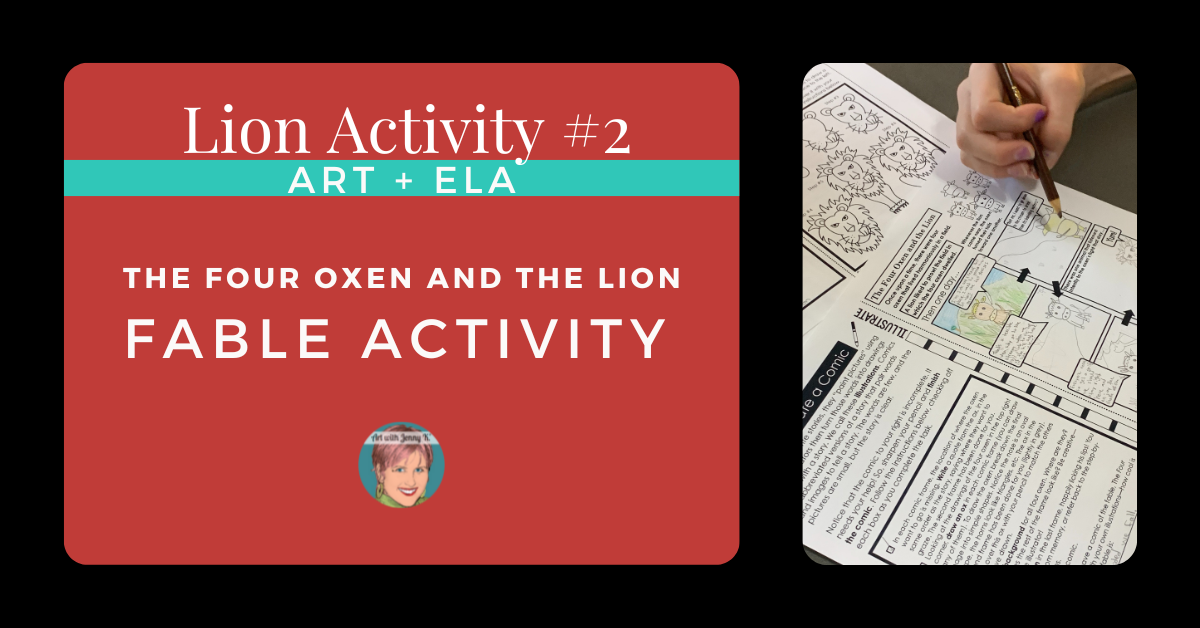
This art integration activity combines art, reading, thinking, writing, and illustrating into a booklet of related learning activities.
This resource comes with a detailed lesson plan and answer key. There are also a few one-page printable posters for your classroom to complement the work you’ll be doing with your students.
I recommend this lesson for grades 3-5. I’ve included three levels of differentiation represented by only a shape at the bottom of the page, so students won’t even know they are completing different leveled work. The lesson can be completed in about 2 hours. You can find this lesson on my TPT store HERE.
How it works
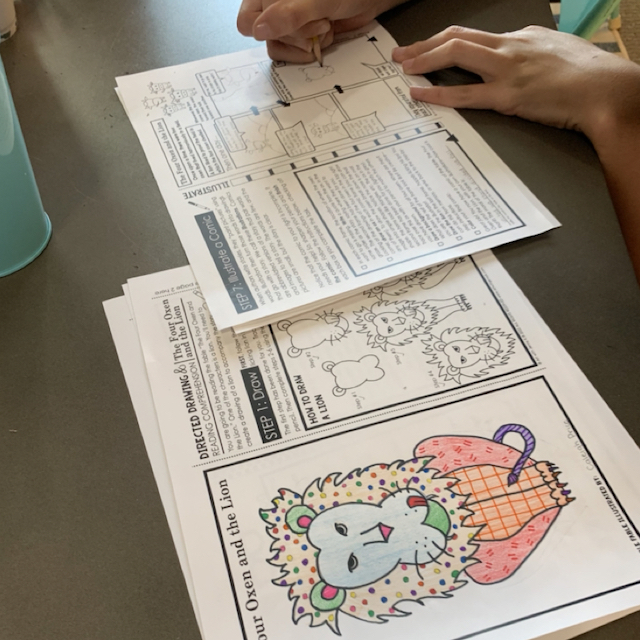
To begin, students will be introduced to the lion character by completing a directed drawing task. This first page becomes the cover of their book.
Then they will read one of three differently leveled adaptations of Aesop’s fable, The Four Oxen and the Lion.
Next, students will answer multiple-choice questions based on the reading. The answers to the multiple-choice questions correspond to patterns that they will add to their lion drawing.
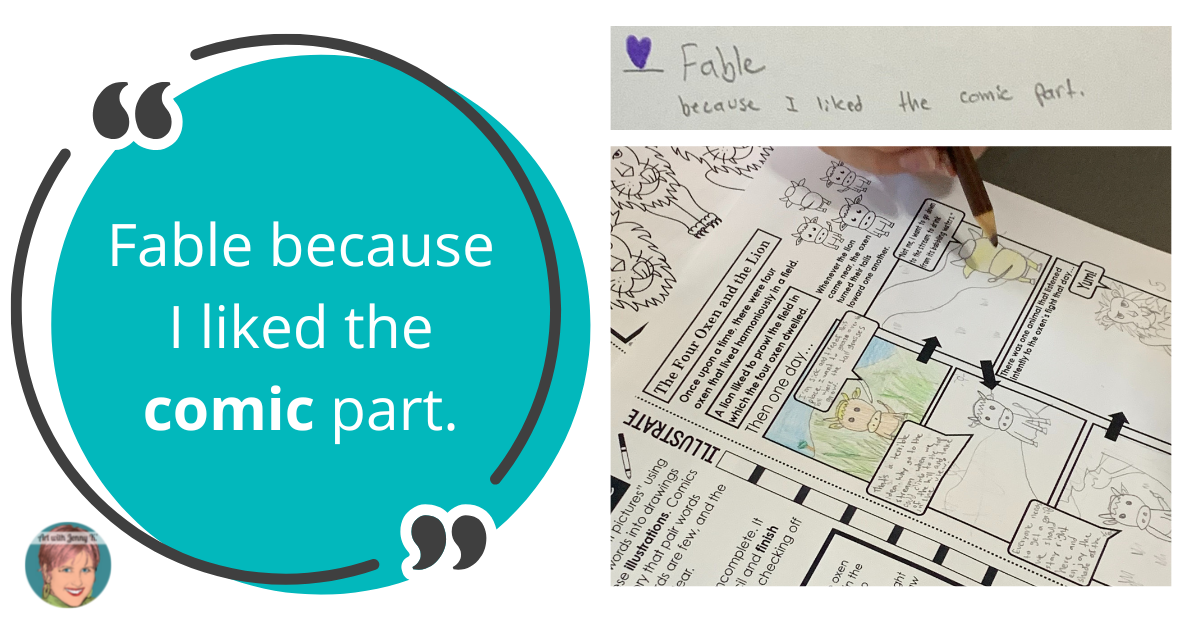
Students will then complete a sequencing task and respond to a writing prompt. These tasks are designed to help them investigate and reflect on the fable.
Lastly, students will combine everything they’ve learned to illustrate a comic strip retelling of The Four Oxen and the Lion.
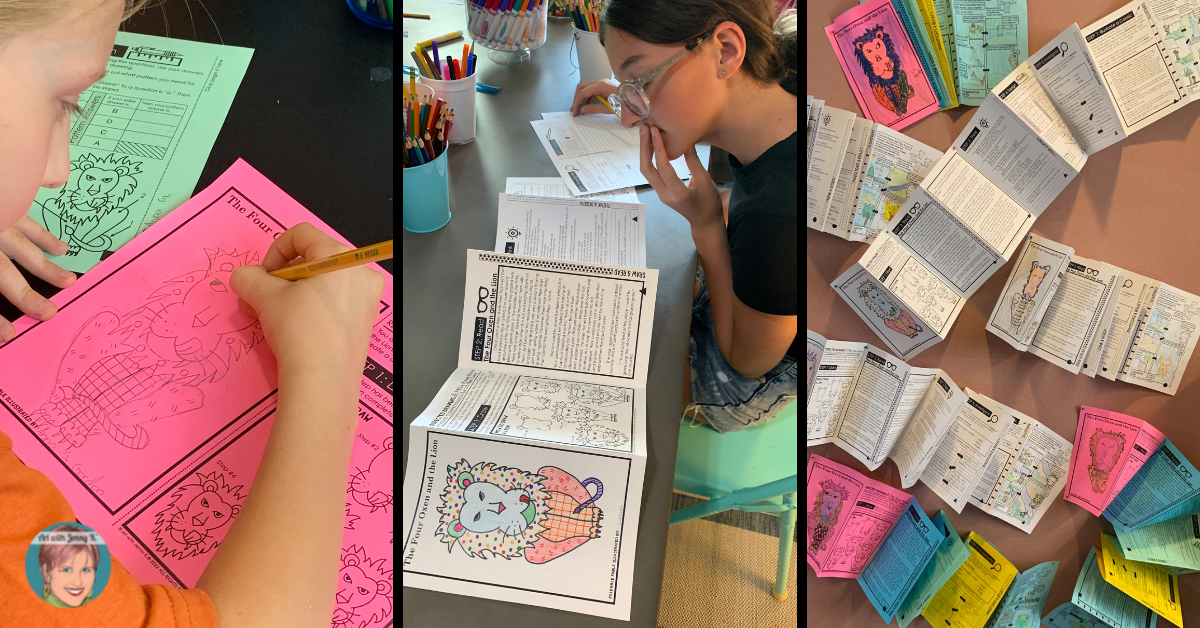
After all of these tasks are complete, students will put together their booklets. I’ve provided assembly instructions with lots of pictures to make sure the process of folding and gluing the pages is as easy as possible for kids to understand.
My students had a lot of fun with this lesson, and I hope yours do too! There are hours upon hours put into this lesson, and I hope the work I have done will save you time and provide an original and helpful lesson to integrate art into your lessons on fables.
You can find the Foldable Fables: The Four Oxen & The Lion lesson HERE.
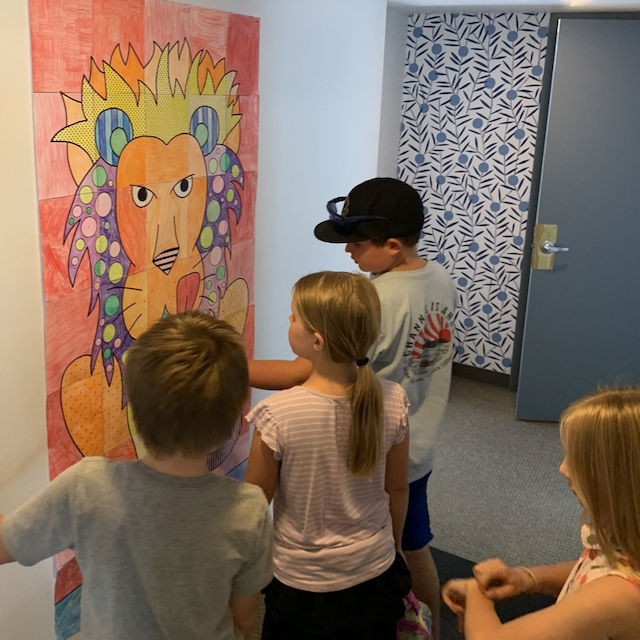
Team Building | Pop Art Lion Collaboration Poster
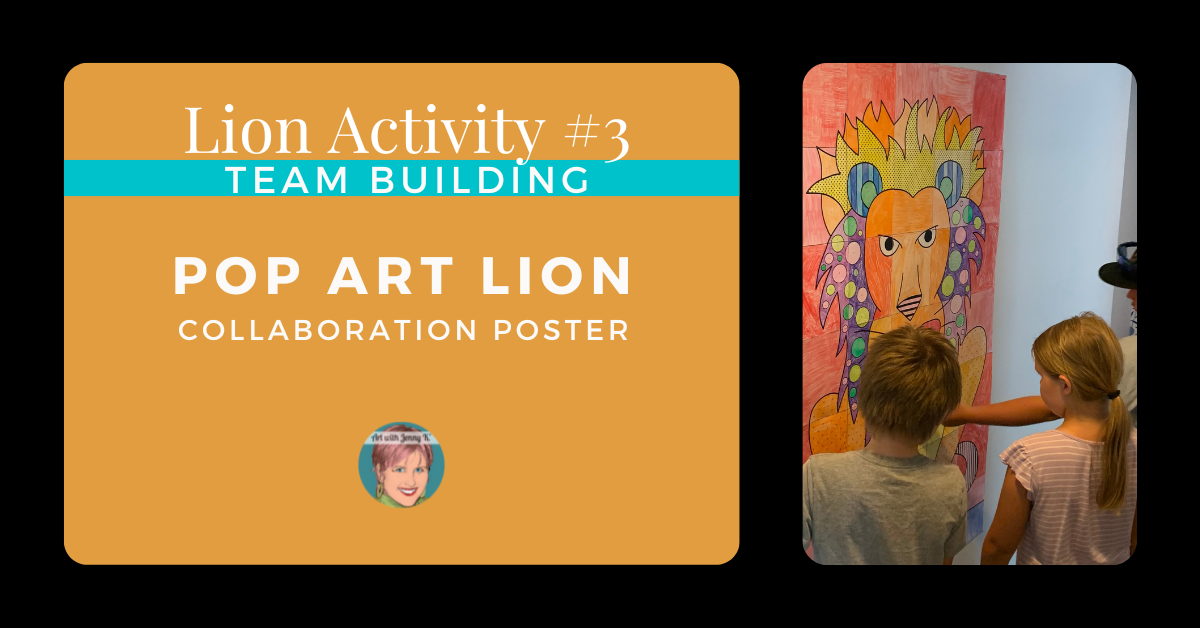
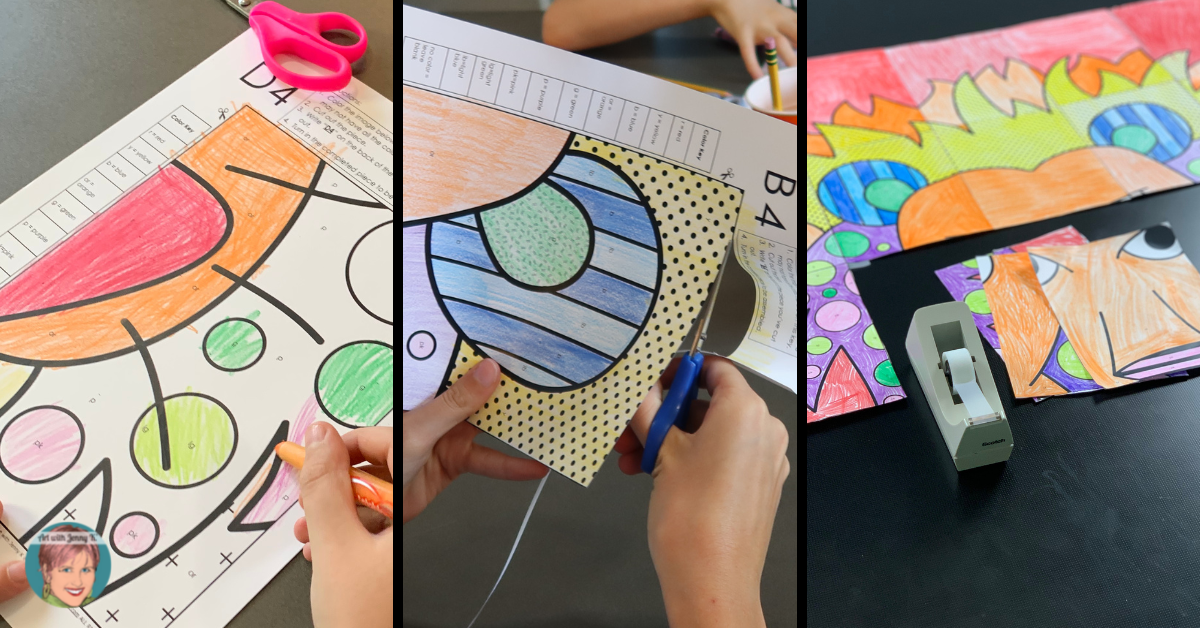
My Pop Art Lion Poster works in the same way as my other collaboration posters. Kids will each color in one of the 35 pages that each fit on a standard 8.5″ X 11″ sheet of paper.
Then they will cut their pieces out and assemble them side by side to create the final poster. You can help them assemble the poster or let them do it on their own. I’ve done it both ways, and there are reasons to do both. Mostly, this depends on the age of your students.
There are two options for the pages of the poster. The first option is where kids color according to a color key. The second option is where kids can color with whatever colors they decide.
Both options will make a beautiful poster that measures approximately 35″ X 63.” This size works perfectly for a door decoration!
This lion activity for kids is a great way to complement lessons about lions or zoo animals and a great way to introduce students to Pop Art.
I love working with pop art because it encourages students to use colors and patterns in new and unexpected ways in their art. Pop Art gives students permission to use “unusual” colors in their work.
My Pop Art lion collaborative poster is a great way to start a unit or cap one off. It is also an engaging way to practice working together and show that everyone’s contribution is important.
You can find the Pop Art Lion Collaboration Poster HERE.
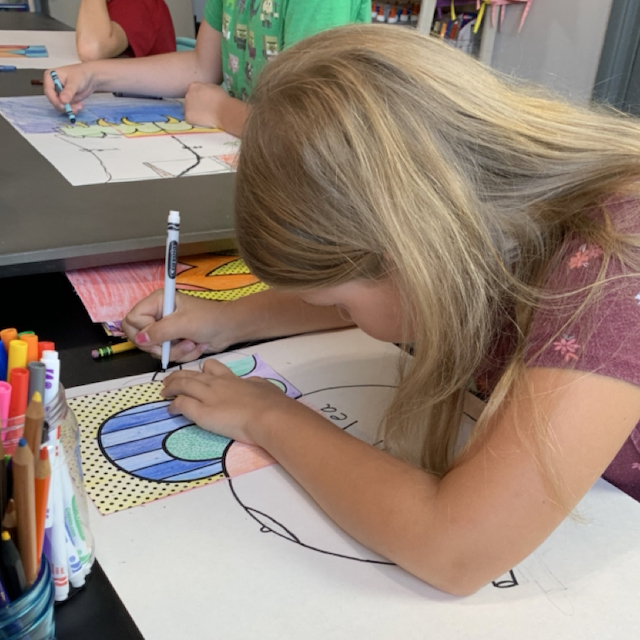
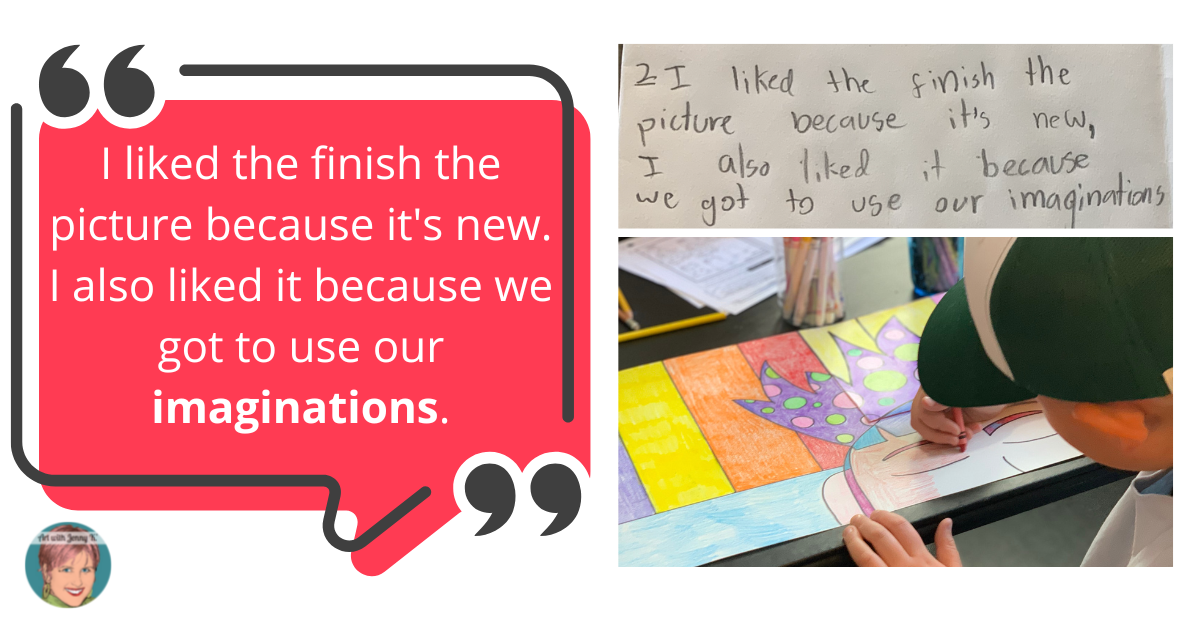
Creativity | Finish The Picture
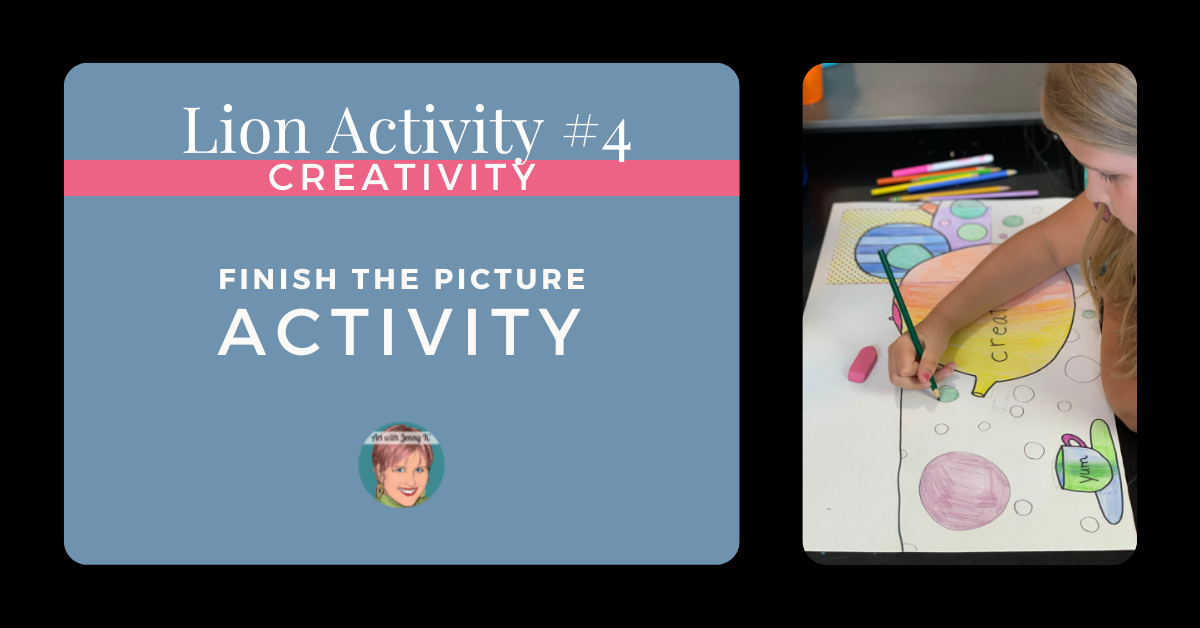
For this activity, we used pieces from the Pop Art Lion poster after we were done displaying it in the classroom. This is a variation on an activity that I call “Finish the Picture,” in which we take an existing image, glue it to a blank sheet of paper, and create new art that includes that image. More on that at the end of this section.
To start, I carefully dismantled the Pop Art Lion Poster. Then, I gave my students a piece that they hadn’t originally colored.
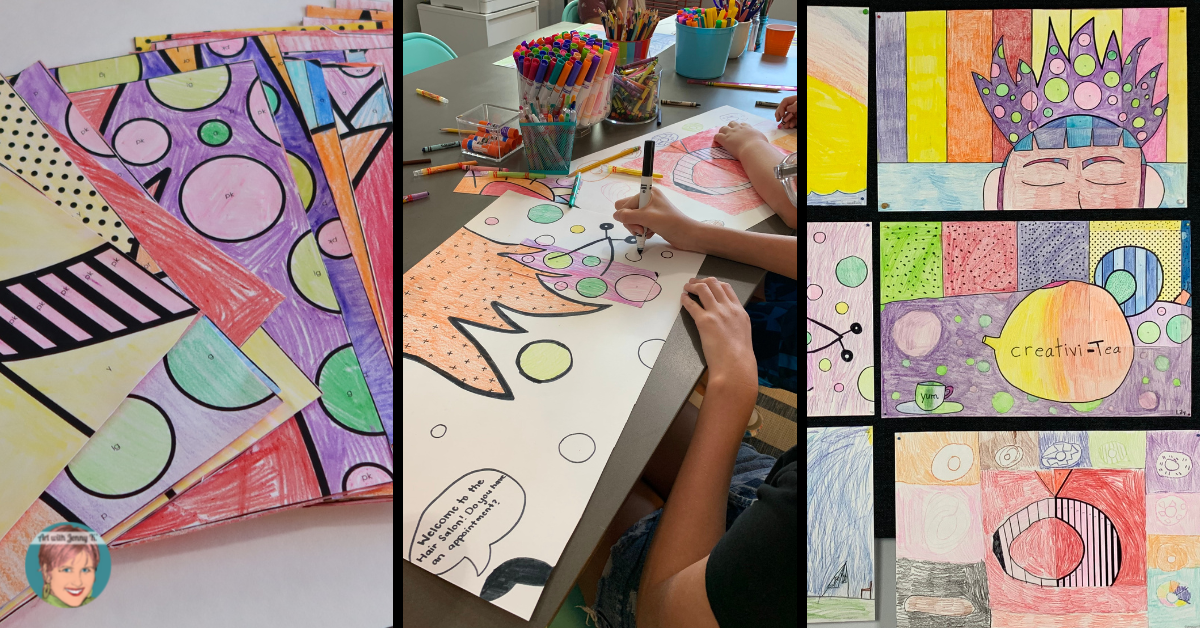
Next, I prompted my students to create a new image that incorporates the piece into it so that you can’t tell that it was previously a part of something else.
I gave my students a paper to work with that was bigger than the standard 8.5″ X 11.” In fact, it was 12″ x 18.” If you have to use smaller paper, you could always cut the individual pieces of the poster down into smaller pieces. Either way, provide your students with a piece of paper that gives them plenty of room to express their own creativity in their new design.
I’m so proud of what my students came up with. I knew they would blow my socks off—and they did! When given a little jump start, or as I like to say, a creativity stARTer, kids will make some pretty amazing things!
I’ve written a blog post that includes more on “Finish the Picture” and other creativity stARTers that you can see HERE.
Also, I have creativity stARTers in my TPT store that I call “Card stARTers.” You can find one set for Valentine’s Day HERE and one for Christmas/Holidays HERE.
I would love to see your students’ work if you decide to create any of my projects with them. Feel free to tag me (@artwithjennyk or #artwithjennyk) on social media so I can see what they make! You’ll find me on Twitter, Facebook, and Instagram!
Thank you for reading and for all you do!
Jenny K.