

I love taking ideas that I’ve used in my art room and figuring out how to make them easy to do in any classroom and for all teachers so they can infuse their lessons with art! That was my inspiration for my line of agamograph resources that I’ve designed and created for teachers (see them all here) and that I first introduced to the Teachers Pay Teachers community. I recently thought of how cool it would be to create an agamograph using emoji expressions.
Make sure you read all the way through to get your Emoji FREEBIES when you join my e-mail list.
But, before I get ahead of myself, I’ll answer the question, ‘what is an agamograph?’
What is an Agamograph?
An agamograph is a series of images that change at different angles. This work is named after the Israeli sculptor, Yaacov Agam, born in 1928 and still living today (2017). This artist is known for his optical and kinetic art. To create his agamographs, he used “lenticular printing.”
Although the process of lenticular printing is technical and very complicated, I have created kid-friendly (and teacher-friendly) agamograph designs that will result in a piece of artwork that they won’t soon forget. There is a lot of “wow!” factor in my made-for-the-classroom agamograph projects. I have interspersed and spliced together the two designs for you, and I have pre-assigned a color to be added to each space. All the kids have to do is color the image, fold it correctly, and hang it up. Then, they can walk from one side to the other and watch their creation change from one image to another. A perfect agamograph! And a lot of fun!
Do It Yourself
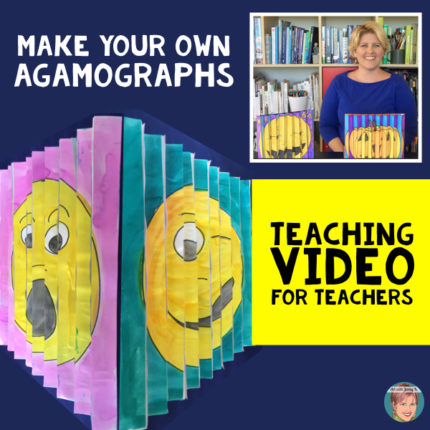
For those of you who have a bit more time on your hand and who want a more involved project, I wanted to show you how you can make your own emoji agamograph with your students starting from scratch. I’ve written the steps in a kid-friendly way so that you could even use this post as the teaching guide and go step-by-step along with your students. You can also find a full how-to video of this lesson in my Teachers Pay Teachers store – it’s free! Check it out HERE.
Step-by-Step
You will need 3 sheets of paper. I used 1 – 12″ x 18″ and 2 pieces of 9″ x 12″. (The sizes don’t matter a lot, but you do need to be sure that the 2 smaller pieces combine to equal the length of your larger piece. Another way to think of it is to take the longer end of your large page and divide it in 2, and you’ll have the size you need for the smaller pages.)
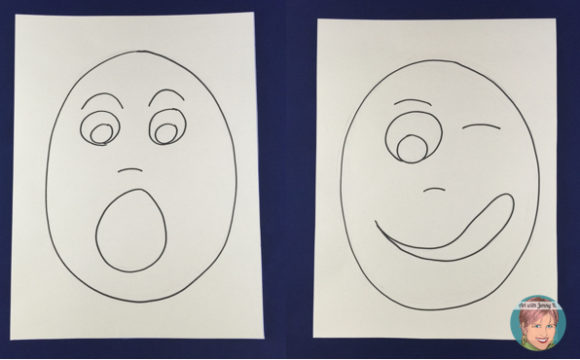
Start by drawing expression emojis on each of the two smaller pages. First, draw in pencil and then outline in black permanent marker.
If you are going to paint as I have done, it’s imperative that the black outline is done in permanent marker because if you don’t, it will smear. If you are going to color these with crayons or colored pencils, then it doesn’t really matter what you use for the outline. Feel free to use whatever materials you have to color with – you don’t have to paint them.
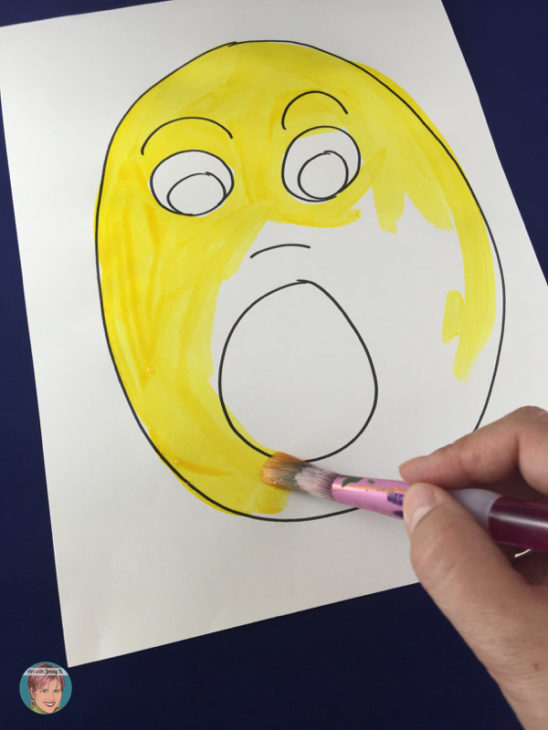
Always start with your lightest color and work toward your darkest color. I started with yellow (pictured above) and then painted the backgrounds (pictured below).
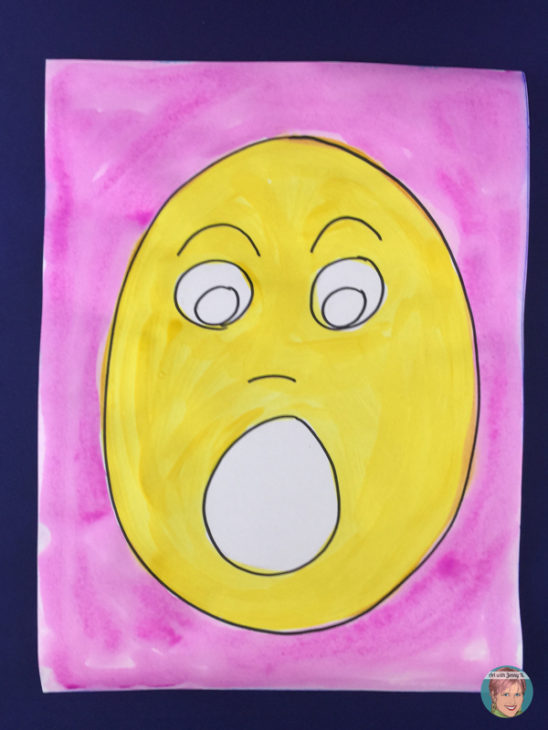
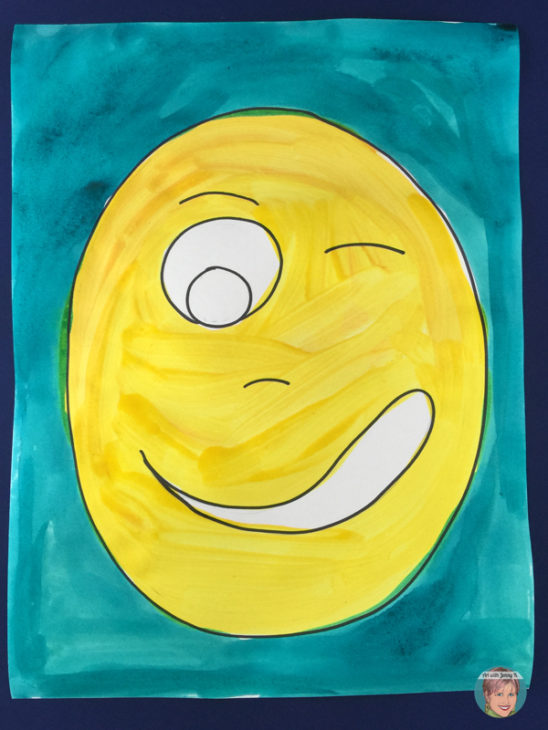
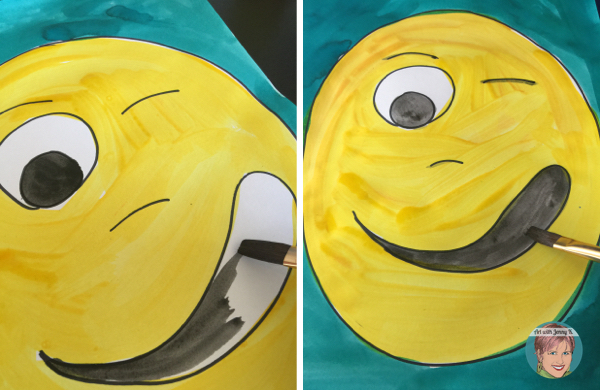
Finish with the black for the eyes and mouth. If you start with the black, your painting (and your water) will get messy very fast – always paint the lightest color to darkest if possible.
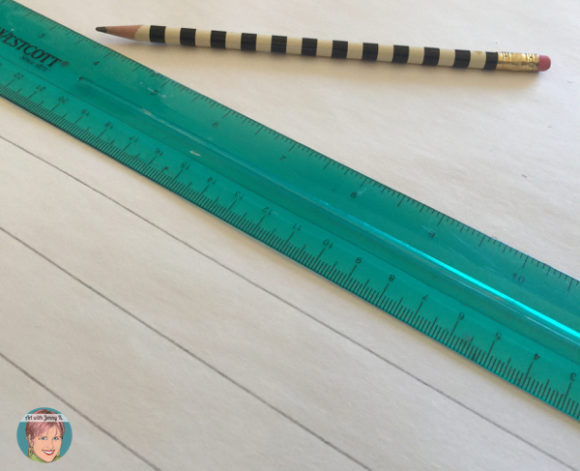
While your paintings dry, pull out your large 12″ x 18″ piece of paper. Use a ruler and mark your page in 1″ strips along the longest side (18″). Remember to line the ruler up at the zero (not the edge of the ruler). Start by making small marks across the page at every one inch, then do the same thing toward the bottom of the page. Turn your ruler vertically and then connect those small marks to get straight, accurate lines and columns that are 1″ wide.
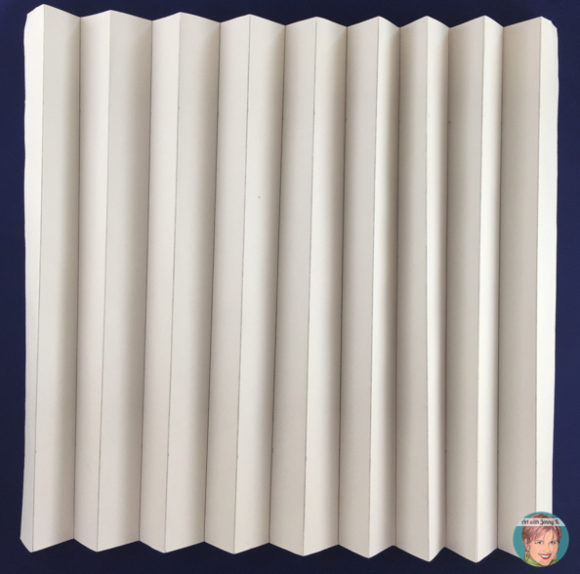
Now that you have your paper divided into columns 1 inch wide, fold your paper in an accordion style – fan fold. Start with the first fold going back and then continue until the end.
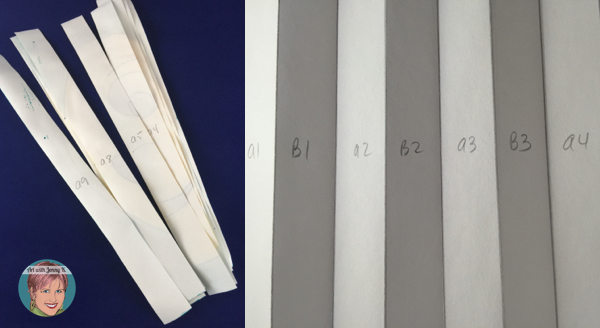
Now you can revisit your paintings – they should be dry by now. You want your two paintings cut up into 1″ strips. You can do this by creating the 1″ lines on the painting as you did with the large blank page, or you can use a paper cutter (adults only).
You will end up with two piles of 1″ strips.
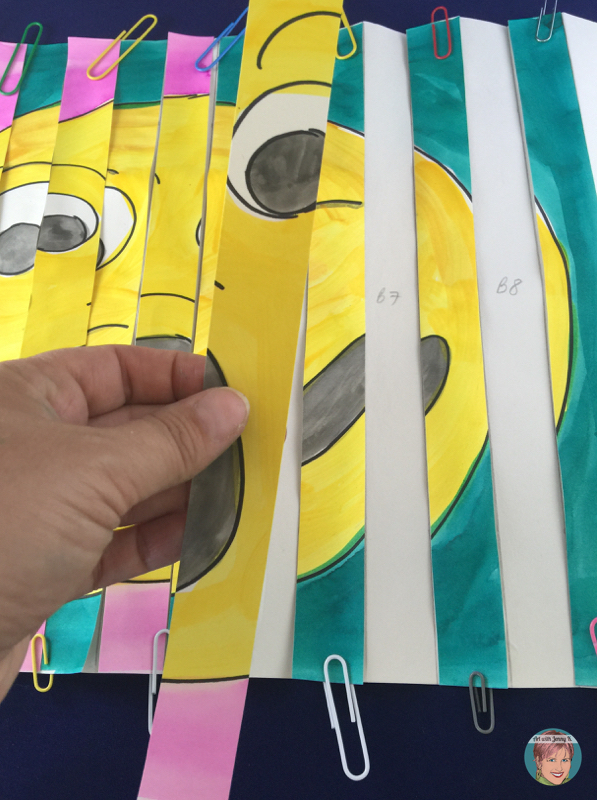
It’s really easy for those pieces to get mixed up, so on the back of them, create a key. I used A1 to A9 on one image and B1 to B9 on the other image. You’ll also want to repeat this on the accordion-folded paper. Like I have pictured below.
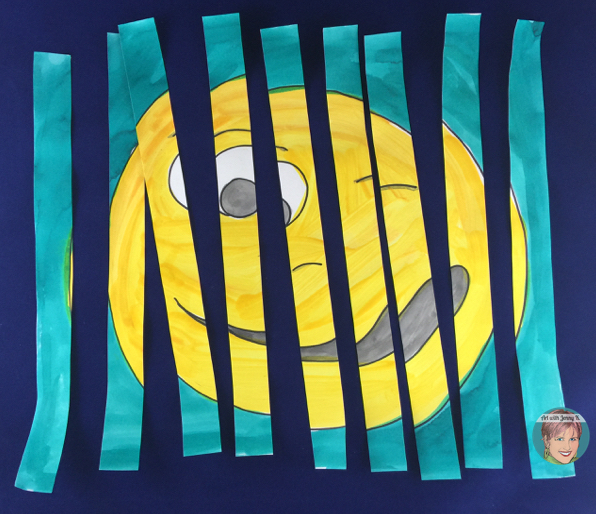
Now take your pile of strips that you have labeled A1, A2, etc., and start gluing them down, skipping sections like this…
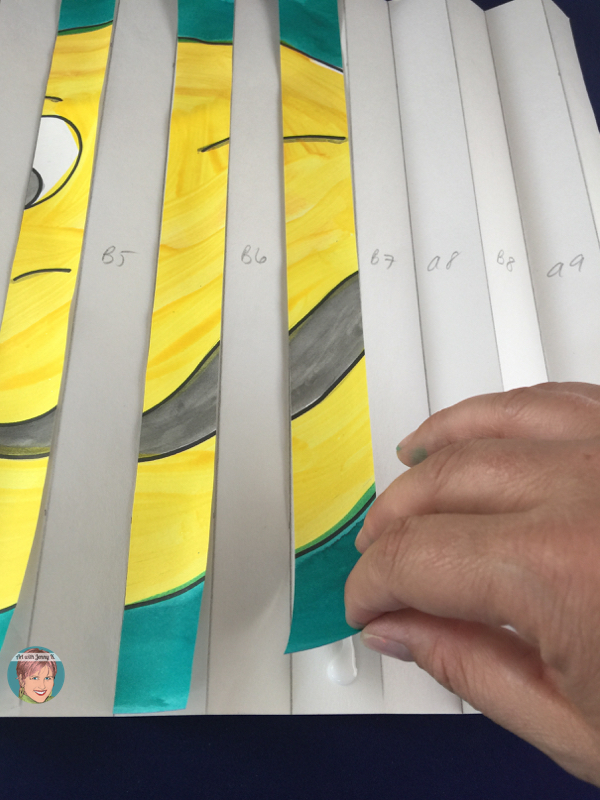
Depending on the materials you’ve used, your ends might curl off the page before they dry. If that happens, put paper clips on the ends until the individual pieces are dry. Like I have done here.
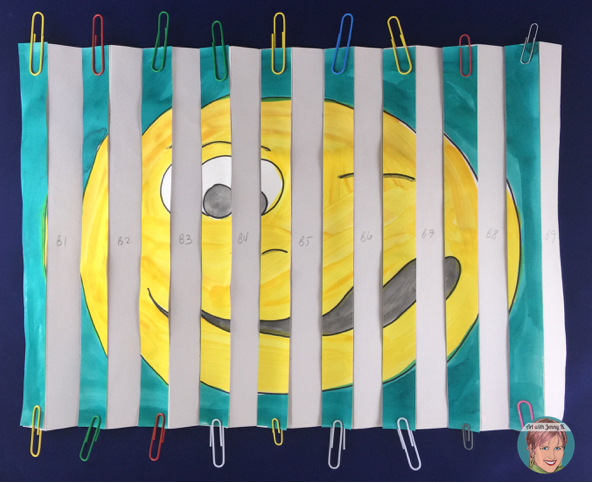
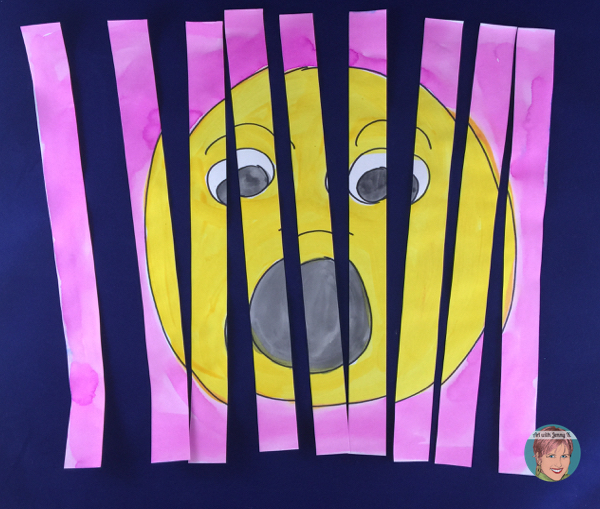
Repeat this process with your second pile of strips. These will be the ones labeled B1, B2, etc.
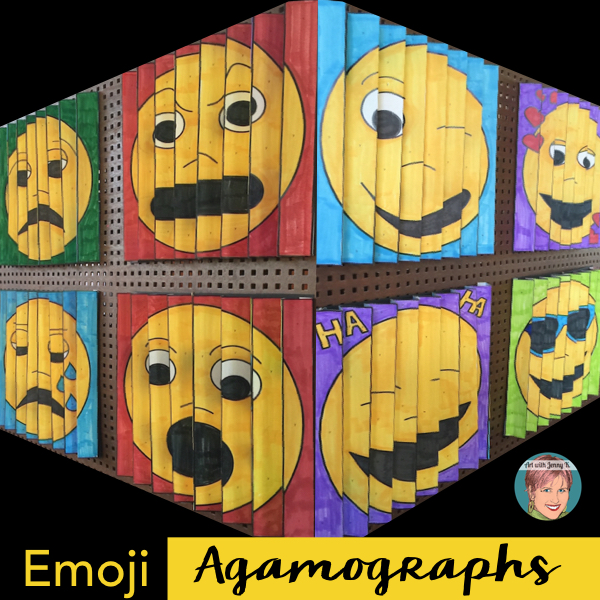
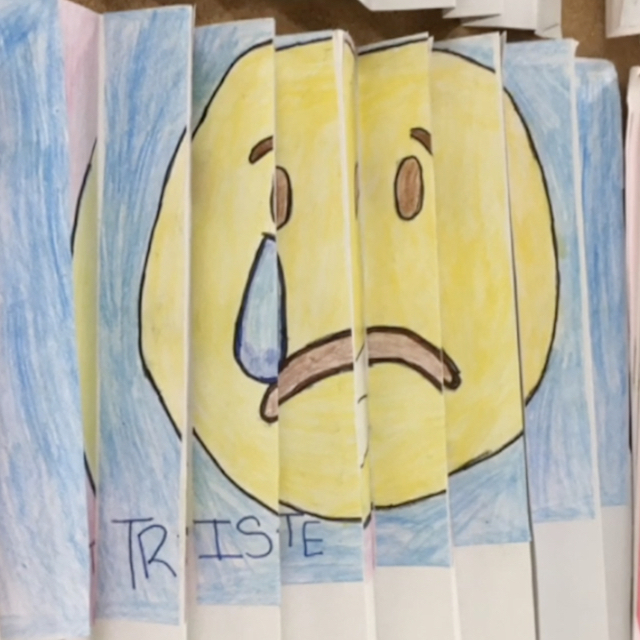
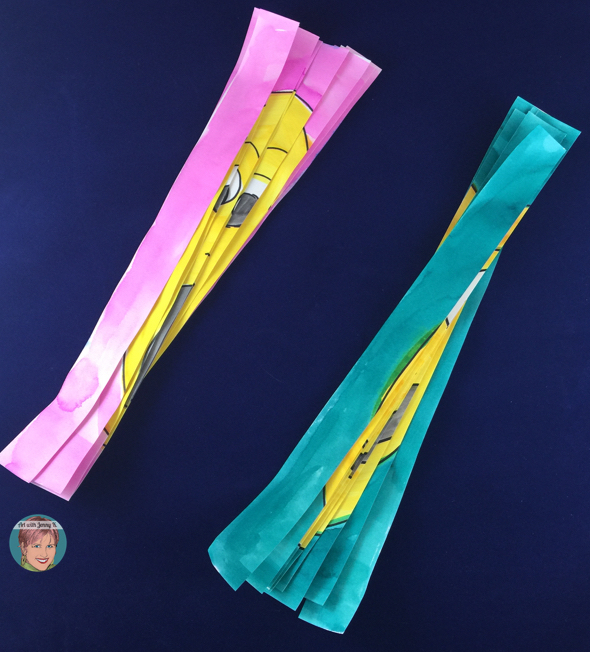
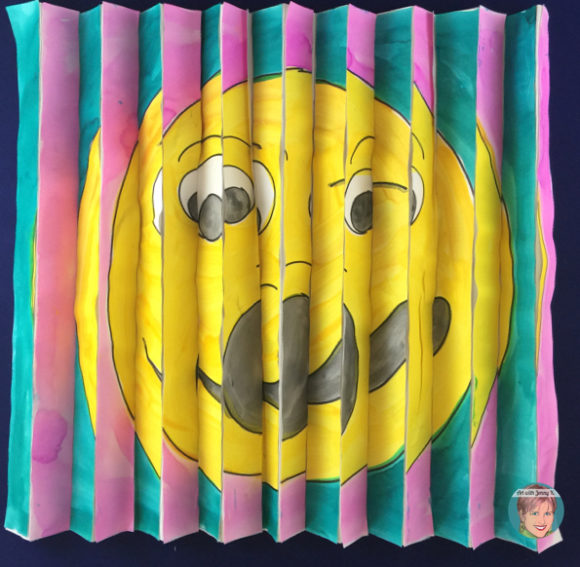
Your final emoji agamograph will look like this from the front…
And this from the sides. As you hold it up in front of you and look from side to side, you will see the image change.
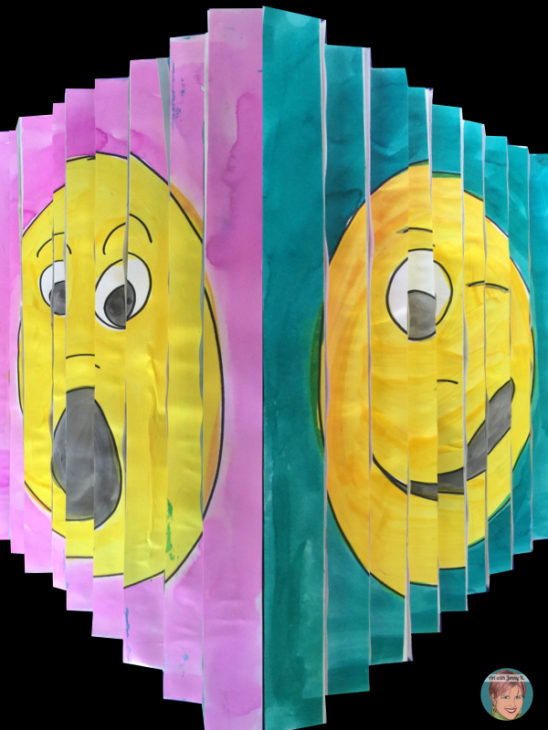
Pretty cool, eh?!?
Emoji Freebies
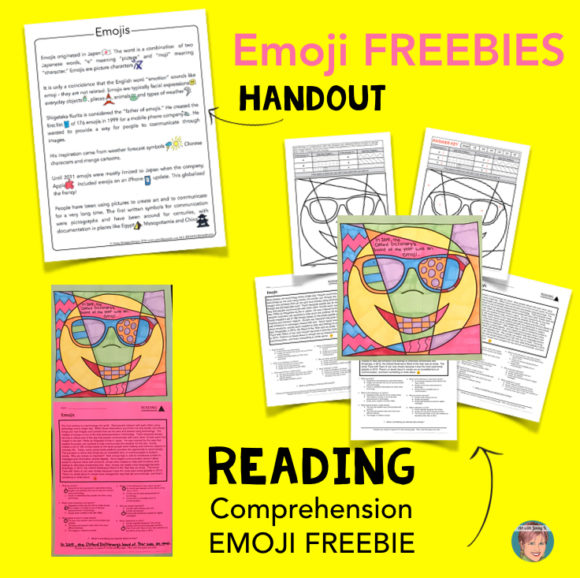
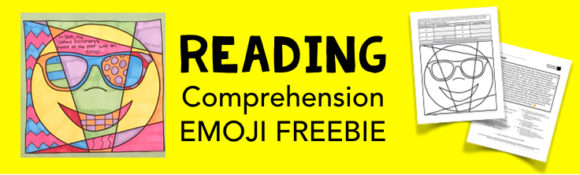
When you sign up for my e-mail list, you will get a free download right away that includes a handout about the history of emojis and emoji nonfiction reading comprehension passages with interactive coloring pages!
The freebie also includes these nonfiction reading comprehension emoji pages that I know your student will love!
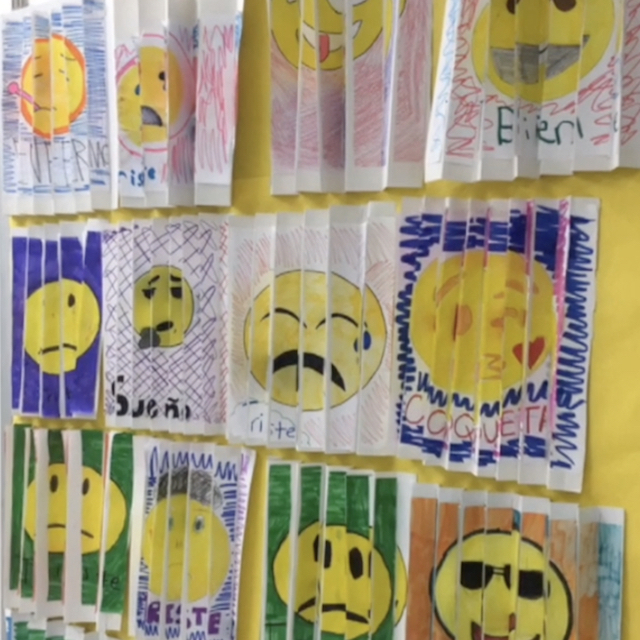
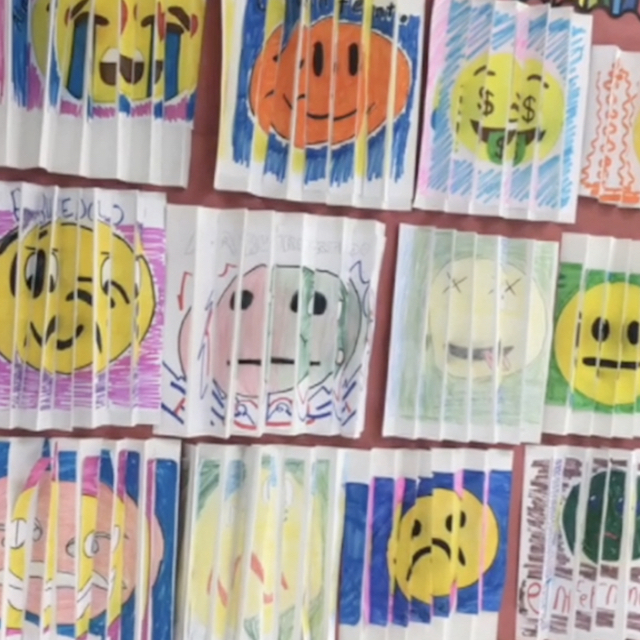
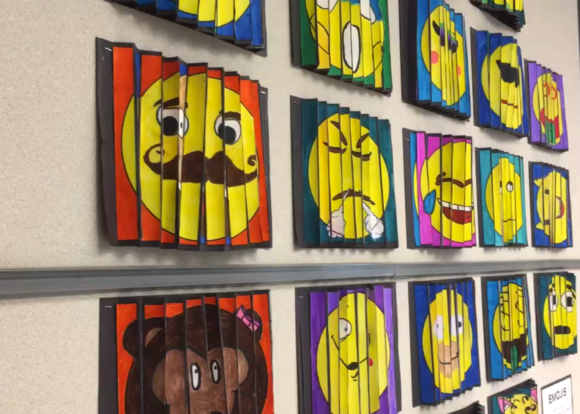
Check out the emoji agamographs this teacher created and shared on Instagram.
If you like these emoji agamographs, and the kids are shouting “More, more, more!!” you can make them with any set of images that you like. To see more of the sets I have already simplified and created–which include designs appropriate for Valentine’s Day, Mother’s Day, Father’s Day, Christmas Around the World, Johnny Appleseed, Memorial Day, Veteran’s Day, and many more — click here.
Thanks for infusing your classroom with art and allowing me to play a small role in the big job you have each day!
Jenny K.